Assigning Time to Clients
Rize offers multiple ways to assign time to your clients, simplifying how you track work for specific clients.
Manually Assigning Time
You can manually assign time to clients using Activities or Entries from the Home tab.
Assigning Time Using Activities
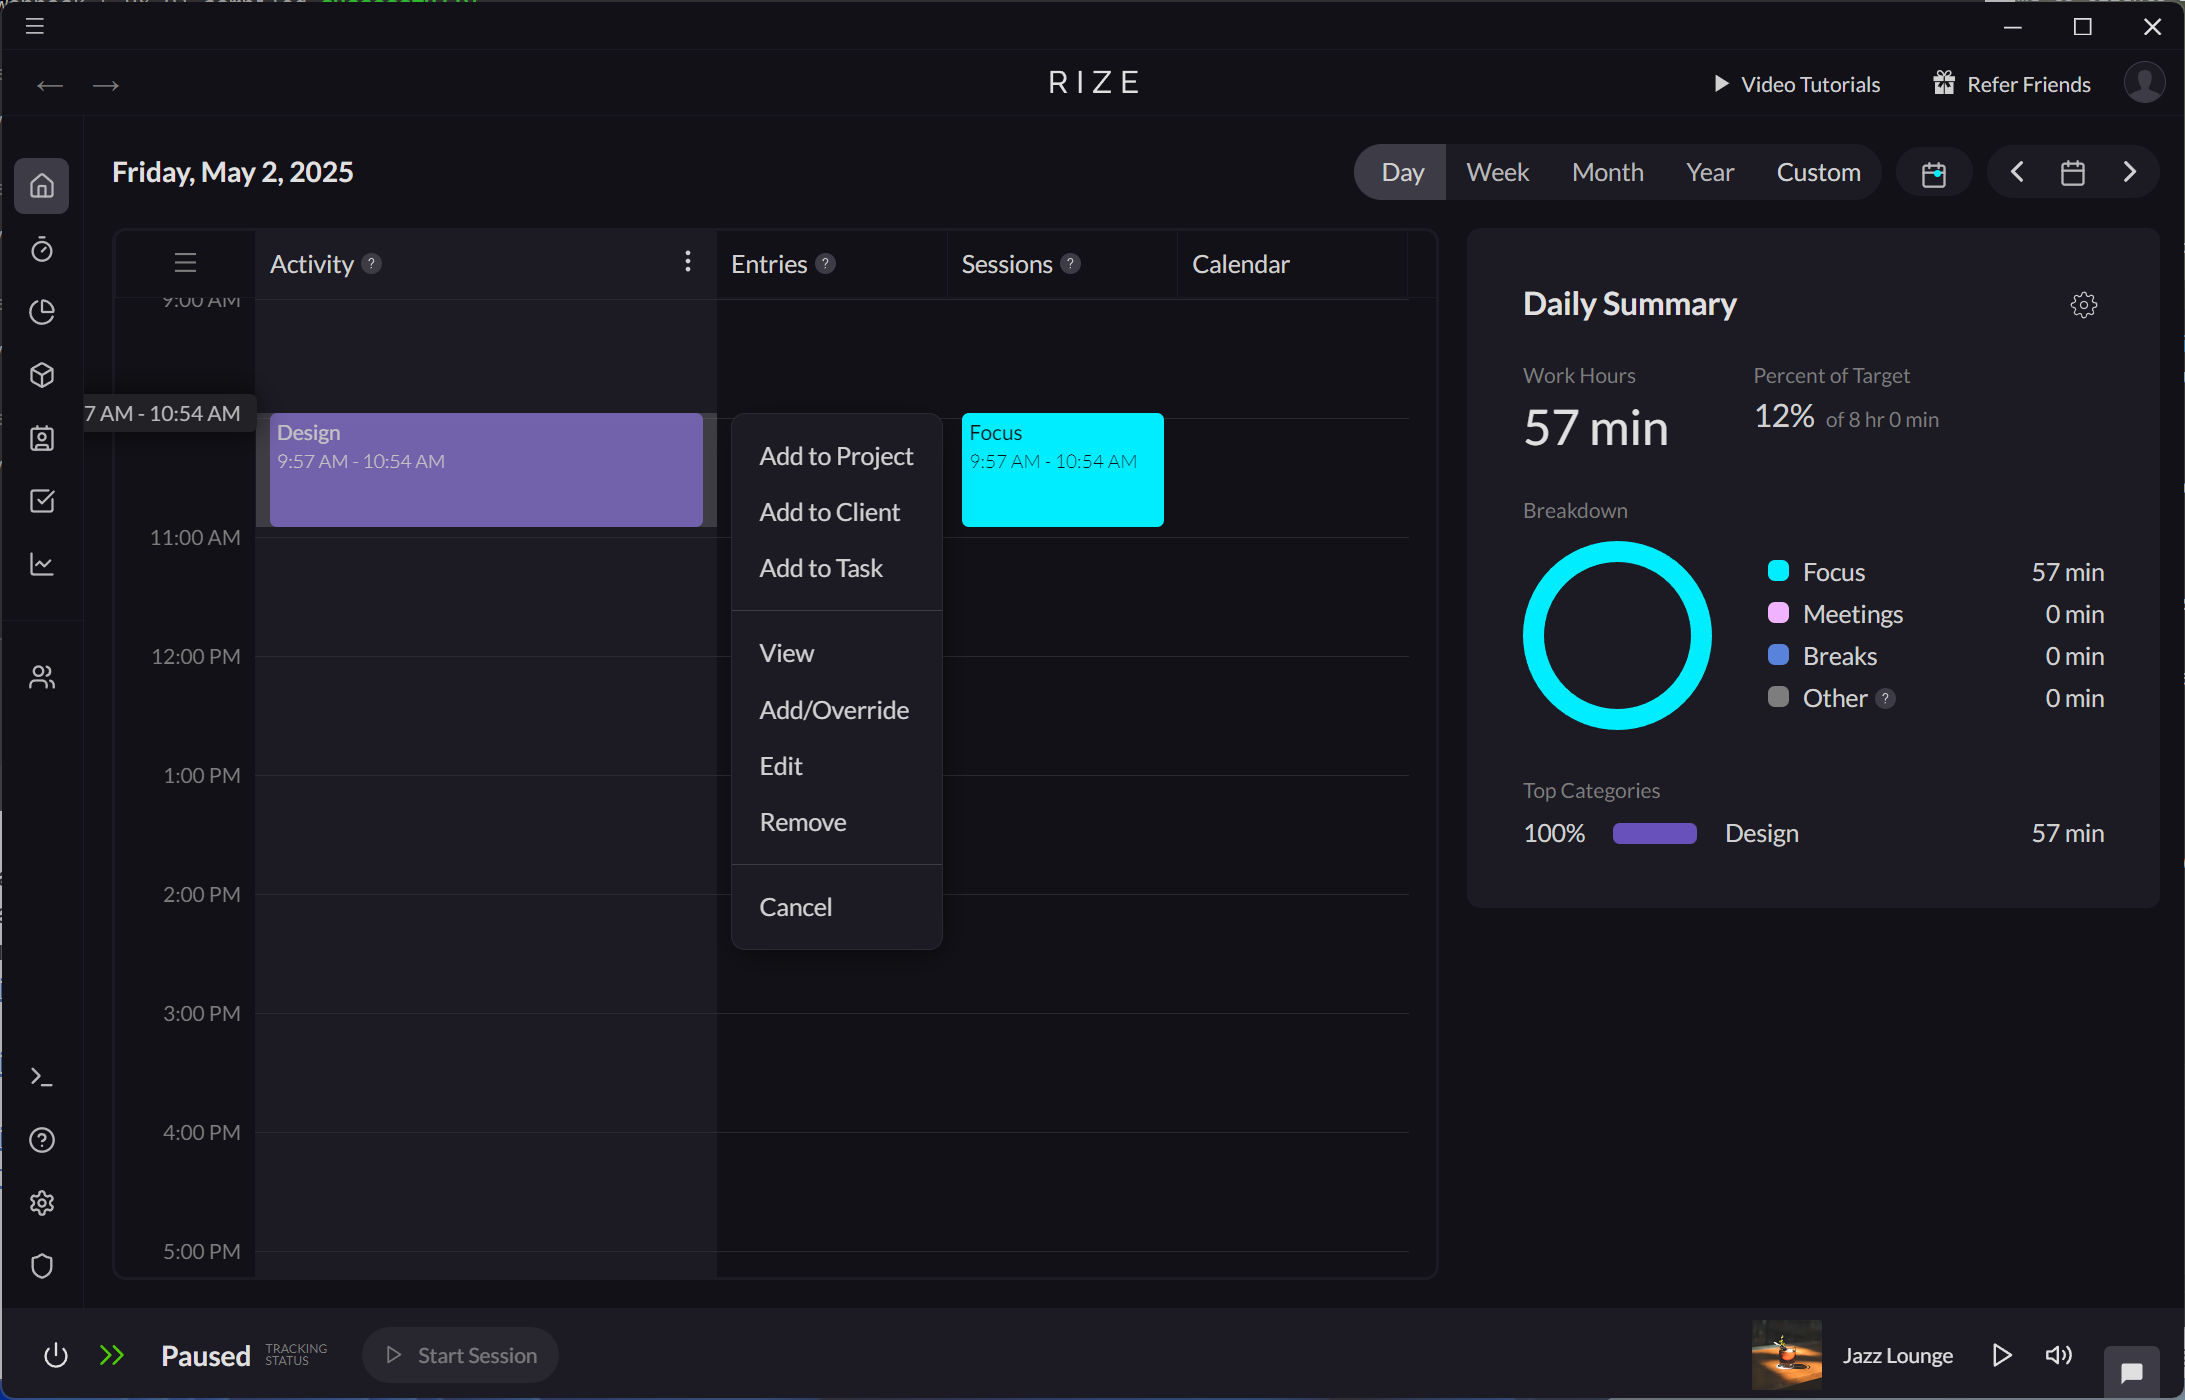
- Select an existing activity on the Activity timeline.
- Select "Add to Client."
- After selecting a client and saving, the time spent on the activity will be assigned to that client.
Assigning Time Using Entries
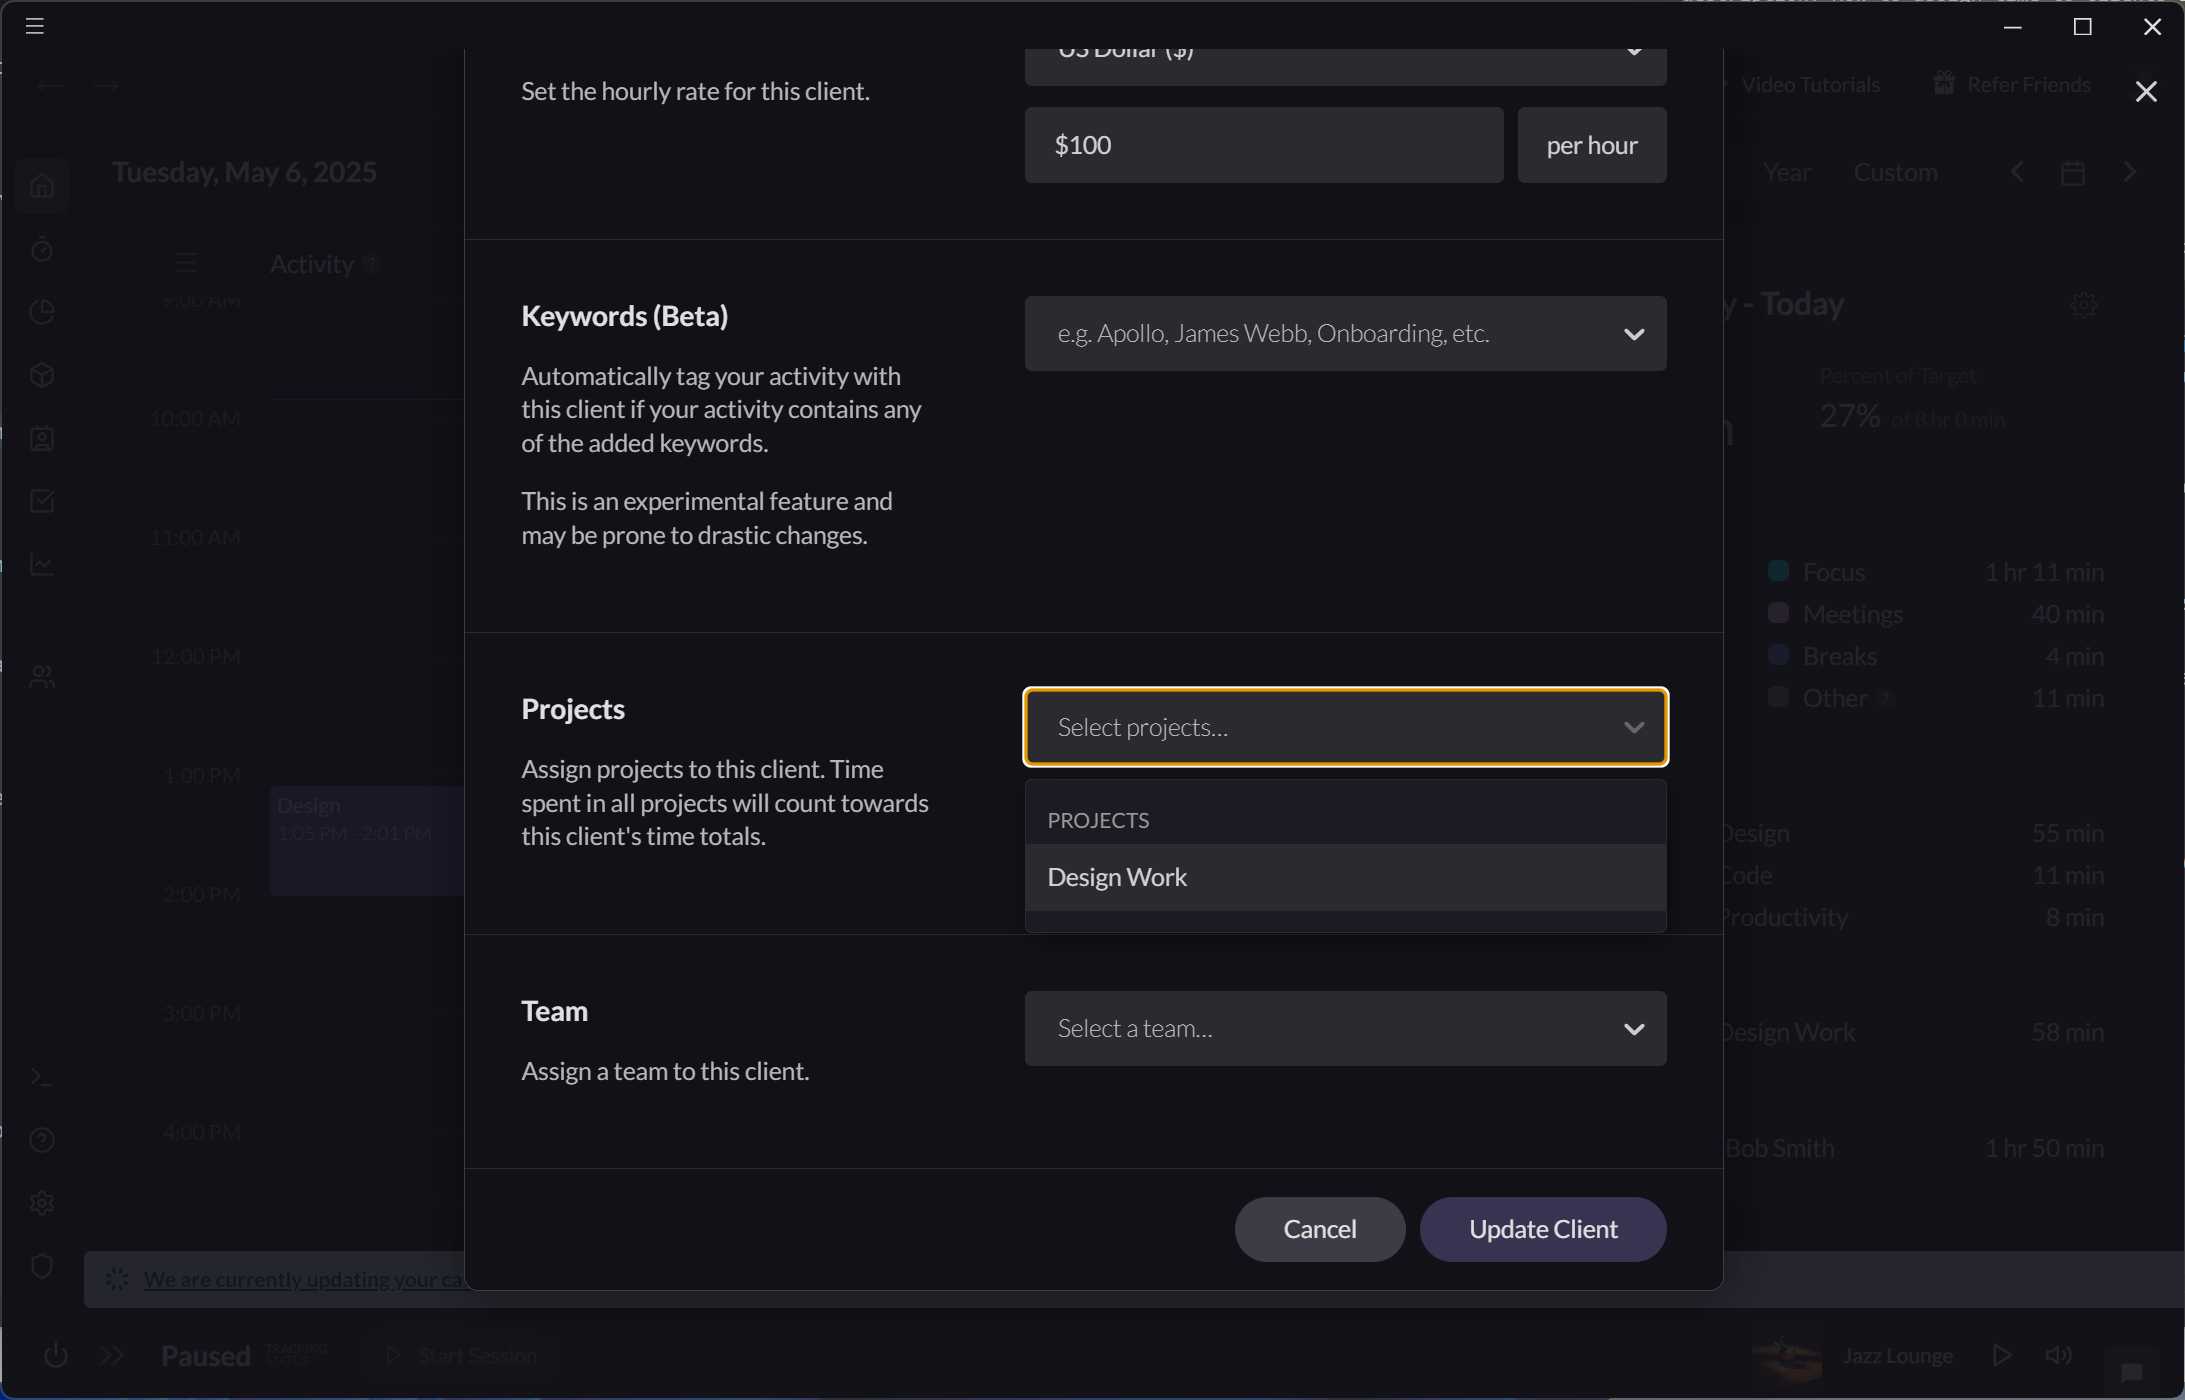
- Drag and drop on the Entry timeline.
- Select "Add Client Entry."
- After selecting a client and saving, the time spent on the entry will be assigned to that client.
Automatic Assignment Using Projects
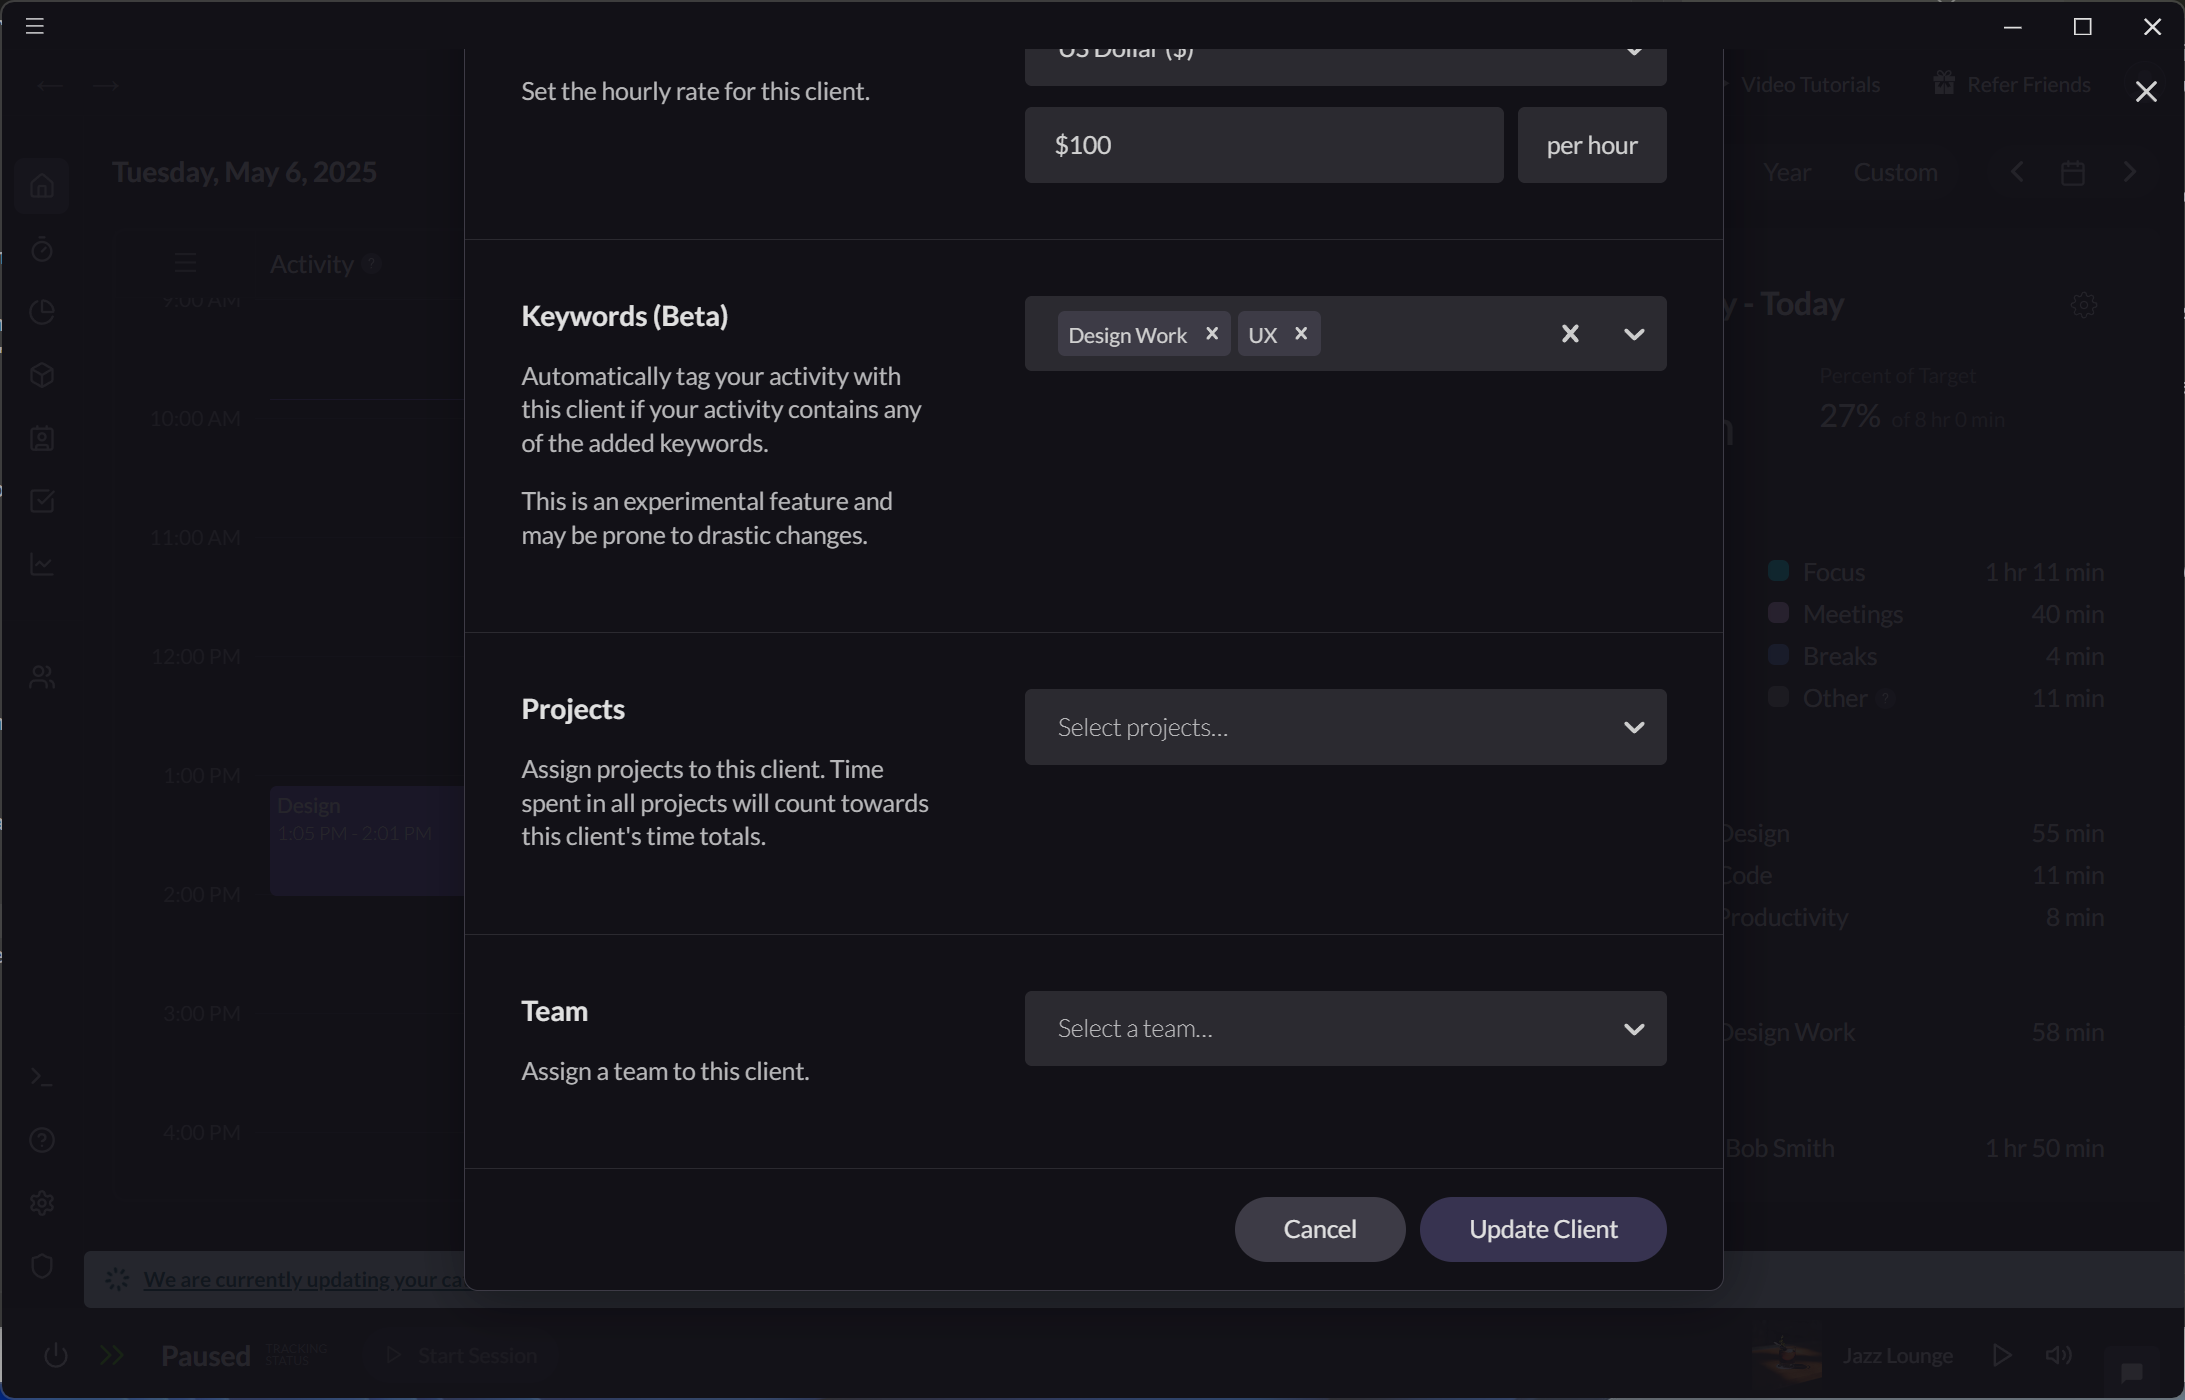
Projects can be associated with a specific client from the "Edit Client" modal. Once a project has been assigned to a client, the time spent in the project will count towards this client's time totals.
- From Clients > Overview, select a client and click the "Edit Client" icon.
- Select a project to assign to the client from the "Select projects" dropdown.
AI-Powered Suggestions
Rize automatically suggests Clients for every Time Entry using advanced AI. The system learns from your work patterns and improves over time, making suggestions more accurate as you use Rize.
When creating or editing a time entry, Rize will automatically suggest relevant clients based on:
- Your recent work patterns
- Keywords associated with clients
- Your historical time tracking data
You can accept these suggestions with a single click, or manually select a different client.
You can add keywords to teach Rize's AI how to recognize your work automatically. Add keywords in the "Edit Client" modal to improve suggestion accuracy.
Automatic Assignment Using Keywords
Rize can automatically assign time to clients based on keywords.
- Add keywords for each client in their "Edit Client" modal.
- When you log time with these keywords, it will be assigned automatically to the corresponding client.